Disclaimer

DISCLAIMER: All images which are not my own are cited with the source and are used here for educational purposes only. If you would like your images removed please contact me directly and I will remove them immediately. Thank you.
Find me more frequently for the time being at Folk-Art-Life.
Showing posts with label proccess. Show all posts

3.13.2011

Studio Time: Surface Design


Okay, so can you tell, I've totally been sick for the last three days. Hence my mass-posting of things I've been meaning to post for some time. No pressure to read it all at once. Take your time to peruse, it might be a while again before I have time to post. Who knows.

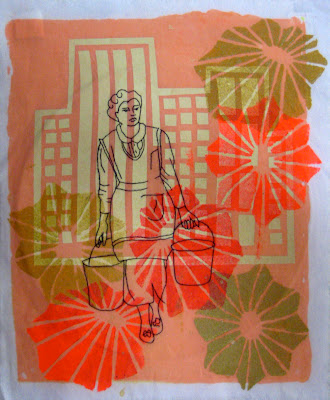
Anyway, I wanted to share a little doodling I've been up to in my Surface Design class. We've been doing a whole heck of a lot of stenciling... Which is cool. I actually really like the motifs I've come up with so far. It started out with a bunch of automatic drawing (top) do loosen up and get some pattern ideas out on the board. Truth be told, I think my intructor was just trying to gauge where the everyone in the class was on the uptightness level and let people adjust a bit to his teaching style. But that's just me. He, he. 


Sampling started with some pigment (screen printing ink) and over-dyeing. I kind of cheated and pre-dyed my fabric swatches with thickened dye. We were supposed to be experimenting with different stenciling techniques many of which you can read about in the book, Printing by Hand by Lena Corwin. I employed the traditional stencil cut from plastic film method and the stencil cut from waxed butcher paper method. I loved the clean lines of the butcher paper stencil. Can you tell which part is from that method? Because I'm really into this compositional thing at the moment I added some embroidered images that were inspired by an old magazine article from 1951.  I'm really digging the way these are starting to look like textile paintings. And they remind me of some of my work from last semester.


These last two pieces were my second set of samples. Here we were testing different dyeing methods. I painted the fabrics with one color of fiber reactive dye (used for cotton and other bast fibers) and then experimented with some thickened discharge applied with a squeeze bottle quite like I apply my underglaze designs in ceramics. I'm hoping to stitch on to these samples as well, but I'd like to use some sketches of children from old family photographs. I'll share as soon as I do.

Our newest sample assignment is all about stamping and very basic repeat pattern. I'm not a basic repeat kinda gal so this might be difficult. I have died my samples lovely shades of lime and aqua, however, which I'm excited about. And I also found that the ends of cheap plastic thread spools make a lovely lotus root-esque stamp or something similar to an okra print. This might work it's way into my clay somehow. Yes?

I'll be sure to post upcoming samples soon. :)

3.02.2011

Video: Gerit Grimm


What an inspiring little sneak peek. I can't believe that Grimm uses the wheel to make her work. How fantastic!


3.01.2011

Open 4 Discussion: The Importance of Process


I found this nice little ceramist spot with Elephant Ceramics on Design*Sponge, just now during my morning coffee blog stroll. I have a slightly tilted reaction to work like this. In my ceramic-traditionalist brain I'm thinking 'those are just slabs thrown over a hump mold with the edges chopped off and the texture hasn't even been removed." Okay, then I remind myself to think about whether I like it before I critique how it's made (which I know little to nothing about actually). I ask myself, "Is it pretty?" And surprisingly I answer YES! I like it. I know not everyone is as fond of rustic aesthetics as me but I love the unrefined. This little moment made me consider why we think process is so essential to art. I'm learning about this now in contemporary art history. And to me, the process isn't essential to the work, as long as the work can stand on it's own. Now I'm not saying that this collection represents the best of contemporary ceramic art... I don't think that's what the potter is attempting here. I guess its a means and ends question.... Does anyone else ever consider this?

How important do you think process is to the value of the finished work?

(image via artist's website)

2.28.2011

Workshop Review: Sharon Virtue


Ahhh... Sharon Virtue. What a wonderful lady and talented artist. Yesterday we got to take a wonderful workshop with Sharon at Clay Creations and learn all of her lovely tips and tricks to design beautifully layered surfaces ripe with depth and color. I've been struggling to reach a quality of surface that I feel good about lately and this workshop definitely inspired me to try some new things. Sharon has developed a great method for layering imaged and color to create a uniquely collaged surface. Learning about the steps she takes made me think a little bit more about how I need to slow my work down a bit and take care to work my narrative into the clay at appropriate stages. I left thinking very differently about how to approach my work, which I think was what I was hoping for. :)

Some of my favorite Sharon Virtue tips?

-Think about what you want your work to do.
-It's okay to use the quickest and easiest way to do things, even if it strays from more traditional methods.
-Never leave any texture on a piece that you don't intend to put there... like canvas or sponge or clay gunk textures. Yuck!

Sharon said this was her very first workshop, though she's been teaching for many years. I congratulate her on a job well done and hope she continues to give workshops so more people can benefit from her fantastic ideas and inspiring energy. :)

2.20.2011

Studio Time: Second Glaze-Firing


Got these out of the kiln yesterday morning.

The good news?

-they look less like Kiefer-Schroeder-Host knock-offs post-firing
-nothing exploded
-I like the crayola colors
-the giant bowl didn't crack


The bad news?

-they're boring as all hell
-I obviously did not put the same number of coats of slip on the Navajo Wheel pieces so they look incongruent and goofy as all hell
-a couple pieces actually did crack
-my Laguna glazes disappeared on the test pieces

So- back to the drawing board, wherever that thing is.

Does anyone have experience firing Laguna mid-range glazes to ^6? I got a couple of matte glazes to try out, but I think taking them to ^6 defeated the matte quality and the color. What do you all think?

Also does anyone have experience with enamels? Like, how do they work exactly?

9.10.2010

Video: Eva Hild


Uh. This is freakin' crazy. One- I love LOVE love Eva Hild. Two- Look at that grog. Three- look at how gigantic and quick her sculpting is and all with her hands and water! Four- Damnit, I wish I knew what she was saying. Can anyone translate?

4.27.2010

Workshop Review: Molly Hatch


The Molly Hatch workshop at Fourth and Clay was wonderful this weekend. I learned a few tricks that I think will help me in transferring my own designs and patterns in the future. I realized a lot of the 'construction' tricks that Molly uses are tricks I keep up my sleeves as well and this made me feel grateful for the wonderful teachers that I've had so far... it was a nice moment of quiet affirmation about my own techniques.

Molly was so lovely, down to earth, and sharing... It was such a treat to pick her brain about her work and hear about the concepts behind her creativity. All the inspiration she draws from textile patterns hit so close to the heart and made me feel a little more motivated to figure out a way that I can marry my own passions in art as Molly has done with drawing and clay.
  

the top-secret wine cork tool 


I won't spoil the workshop for any of you... in case you ever get the chance to take it yourself, which I would highly encourage. She shared so many lovely (and practical) secrets including glaze, engobe, and clay recipes. One small secret I will share is the wine cork plus needles scoring tool trick.  I've known of this little DIY tool for a while, but never made it. After watching Molly use it, it was the first thing I did when I got home. With this little bugger all you gotta do is dip it in the water and score. The needles hold more water than a toothed rib or fork and don't gunk up like the commercial scoring tools. It's a one step scoring process that creates the slip as you scratch the clay-- awesome.


Molly building an 'envelope-giftbox-coffin' vase... 
we couldn't figure out the proper term.


Molly tracing her designs through her template onto the tile...


 Molly scratches the transferred depressions a little deeper...


 The mishima pattern after being filled with 'ink' or very thin slip...


Molly 'paints' her designs (normally after bisque) with special 
engobes that mimic some qualities of oil paint...


Molly was also having a show at a local shop, Lola, that we took a detour to see... It was lovely to see her work in person and be able to fondle the pieces a bit. The mirrors (not pictured) were absolutely lovely and the frames she creates for her pottery transform quaint little tea cups into striking wall sculptures. If you ever get the chance, you must see her work in person...


 a mounted teacup
 
a pitcher perfect for iced tea

a teapot

 even the underside of the teapot's lid has a lovely detail


For more about Molly's workshop check out Linda's post. Her photos are fantastic and she shares a few more images of Molly's work as well.

Lastly, I wanted to say, the ladies at Fourth and Clay-- Josie, Rae, and Christa-- are so incredibly lovely. I'm so glad they opened their beautiful studio and welcomed us all in to partake in such a great class. They are having a Sale next weekend that I am looking very forward to. I just might end up with several mugs for the month of May...

4.05.2010

Margaret Bohls Slab Teapot Tutorial


Ceramic Arts Daily posted an awesome tutorial by Margaret Bohls today. I just got through with reading it and it is a gem. It's like a free (and very handy) workshop. I am so juiced to get back in the studio and try some of these techniques out. I use slabs often in my sculpture, as well as weird slab-coil combos, so these tips seem really appropriate as I start translating my hand-building skills into pottery usage. Anyone else a slab-builder? Do you roll by hand or do you use a giant roller?

Please make sure to check out the tutorial here and sign up for the Ceramic Arts Daily newsletter if you haven't already.  They've really been sharing some awesome articles lately.

(image via Ceramics Arts Daily)

2.01.2010

Bas Kools


You should check out this artist/innovator's website. He has created this crazy technique for mold-making that takes supreme advantage of the flexibility of sponges. Super cool.

(all images via artist's website)

12.01.2009

A quick chat with Erin Furminsky


There is a lovely little article written by one of my favorites, Erin Furminksy, on the Ceramics Daily website. It's short and worth the read. ;)


11.25.2009

Studio Time: a Shino Before & After

Sorry this post is sooooooo image heavy, but they all seemed pretty important.  The images are small for better viewing on the blog, but if you click on them you can see larger images.


This is what happens to shino when you dip it twice in what you think is a very thin shino concoction (too thin in fact) and then realize it was perfect all along and you shouldn't have done two 3-second dips.


It crystalizes. And you think to yourself 'holy crap what happened?' and 'how the heck am I going to load that into the kiln without crushing those delicate formations?' and finally 'damnit. I spent hella hours painting these things and now they're gonna come out really f*cked up.'


Then you get it back from the kiln along with these two pieces: same oxide patterns, same glazing, same firing... And you think to yourself 'at least I got two pretty pieces.'


Then you look inside, and it hurts even more. The insides are perfect and exactly what you wanted to happen on the outside.


But then you sit with them some more. People from your class start picking them up with 'wow, are these yours?' and 'oooh, how'd you do this?' You start to look at your pieces a little more carefully.


You remember what your classmate said about crystals and carbon trapping.  You think 'that's kinda cool.' You remember the magic that happens in the kiln.


You remember last semester when another classmate got a bowl out of the kiln that looked like one of these cups and how gorgeous you thought it was, and how much she hated it.


You start to notice all the details on the cups. The deep kelp greens, the shimmering smokey grays, the freckled salmon... You notice the crazing and the run of the oxide. You notice the gorgeous contrast between the outside and in and the point at which they meet.


Before you know it you've picked your favorite one and decided how you can't wait to give them to the friend you know will love them most, but are slightly sad you can't keep them, too.

The lesson, which many of us know but often forget?  The kiln is a magical place... a place that you can't begin to affect or imagine... it is silly to become attached to the idea of what you think something will be,  and important to be open to all the possible things it could be.

The kiln is like a box of chocolates... you never know what you're going to get.

P.S. Sommer Olvia wanted to know how I get these patterns. It is very simple. I paint them on by hand with RIO (red iron oxide) and then dip them in shino. I'm now starting to think spraying might be a better way to go, however.

Related Posts with Thumbnails